Mikuni Carburetor Test & Rebuild Info…
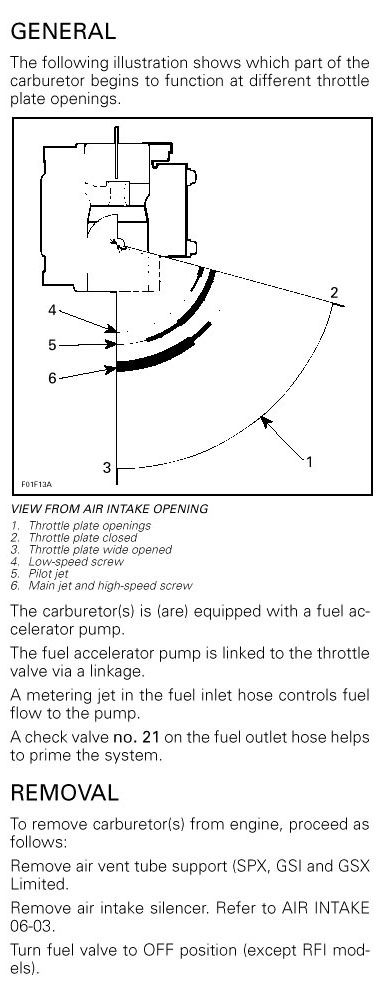
The following procedures test the carbs fuel pump and other various carburetor functions to make sure they are working properly and within specifications. At the bottom of the page are also the oem procedures for a rebuild which applies to single or dual carbs. The Pop Off test requires you to use a hand pump Pop Off Tester (Sea Doo #295000114 or similar) with a gauge range from 0-60 psi. Generally, any Pop Off reading under 15 psi is a failing unit and needs repair. Also note OSD sells popoff testers here if interested in one.
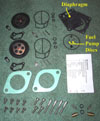
Picture A
Picture A
Fuel Pump Verification
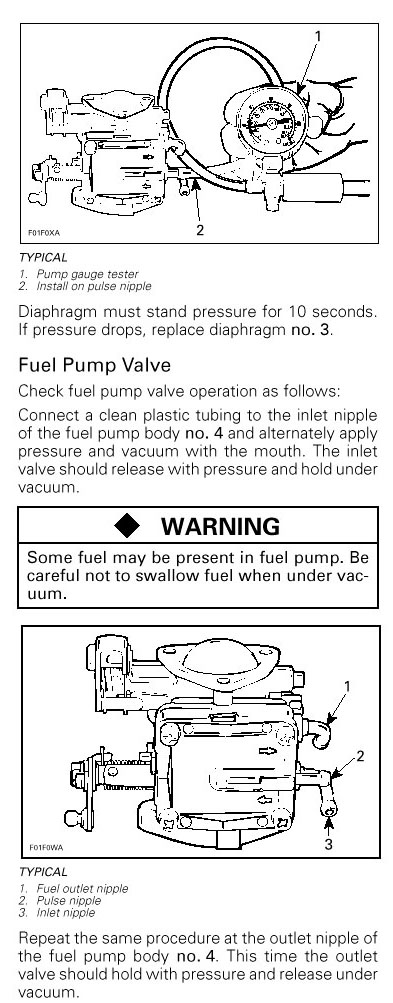
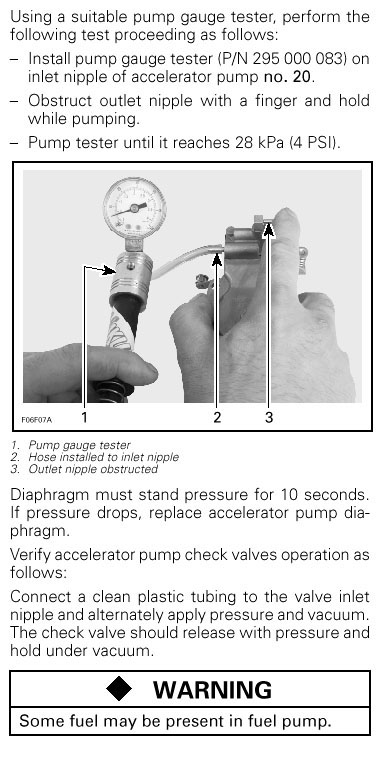
Check fuel pump valves operation as follows:
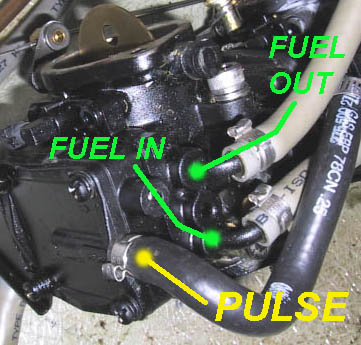
- Connect a clean plastic tubing to the fuel inlet nipple (see Picture A) and alternately apply pressure and vacuum with the mouth. The fuel inlet valve should release with pressure and hold under vacuum.
CAUTION: Some fuel may be present in fuel pump. Be careful not to swallow fuel when testing.
- Repeat the same procedure at the fuel outlet nipple.
This time the outlet valve should hold with pressure and release under vacuum.
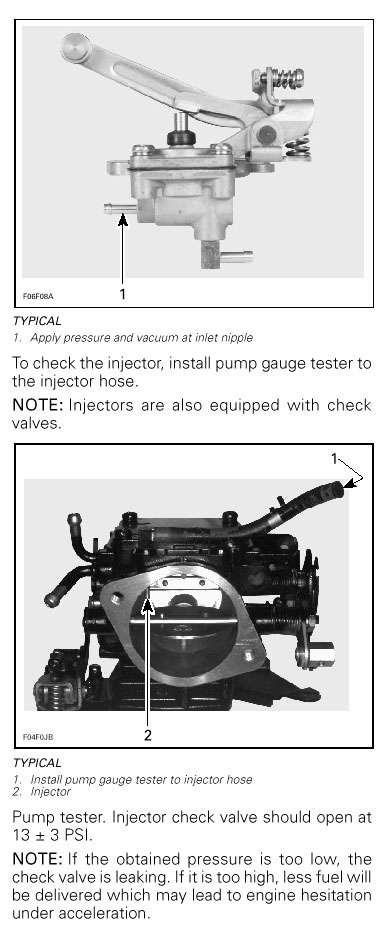
Fuel Pump Diaphragm Leak Test
Using a suitable pump gauge tester (like Sea Doo P/N 295000114), perform the
following test as follows:
- Install pump gauge tester on the pulse fitting (see Picture A).
- Pump the tester until it reaches 28 kPa (4 PSI) on the gauge.
The pump diaphragm must stand pressure for 10 seconds. If the pressure drops, replace the pump diaphragm.
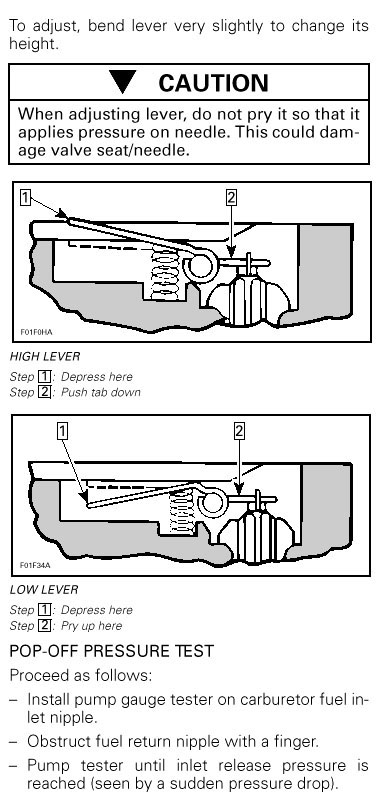
Pop Off Pressure Test
When rebuilding carbs, people constantly want to mess with popoff when in most cases it isn’t necessary. I think they listen to too much bad advice telling them it is a step that has to be done. If your engine is stock and you're rebuilding your carbs, you should be reusing your oem springs and if installing a new needle, using the same size as oem. If you do that and adjust the arm height properly, you should never have to mess with popoff. Spring size and needle size pretty much determine popoff so why mess with that? Put it back together the way it was and run. If you rebuild the carbs and it doesn't run right with the same needle/spring combo you had when new, you've done something wrong in your rebuild or there's another problem in the system causing your issues. I've rebuilt more carb sets than I can count and what I've said holds true in pretty much every case.
If you want to check/adjust popoff, proceed as follows:
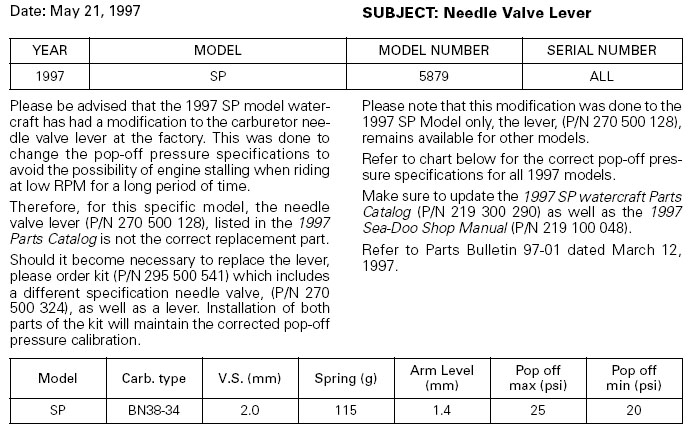
- Check the specs page to find out what your model/year Sea Doo popoff should be set at.
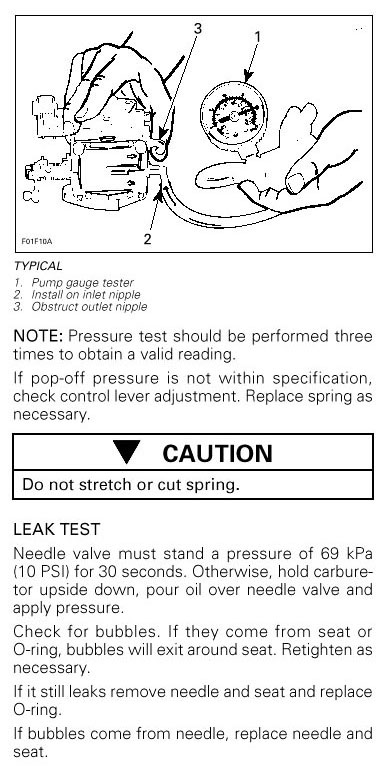
- Install pump gauge tester on carburetor inlet nipple (see Picture A).
- Obstruct outlet nipple with a finger.
- Pump tester until inlet release pressure is reached (seen by a sudden pressure drop).
Refer to the following table for setting Pop Off if you want to get in the ballpark before testing or if you don’t have a tester.
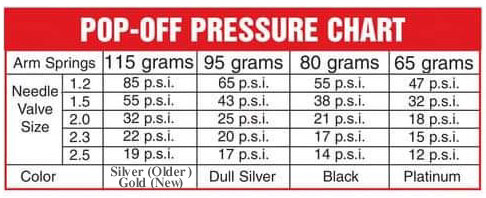
NOTE: Pressure test should be performed three times to obtain a the proper reading.
CAUTION: Do not stretch or cut spring.
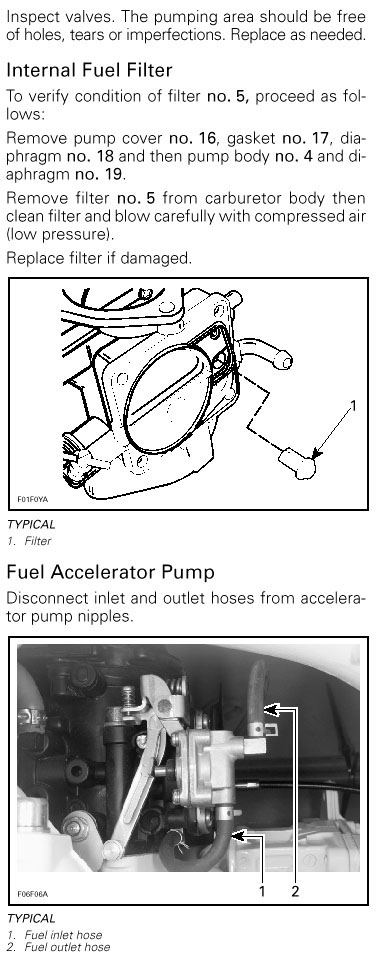
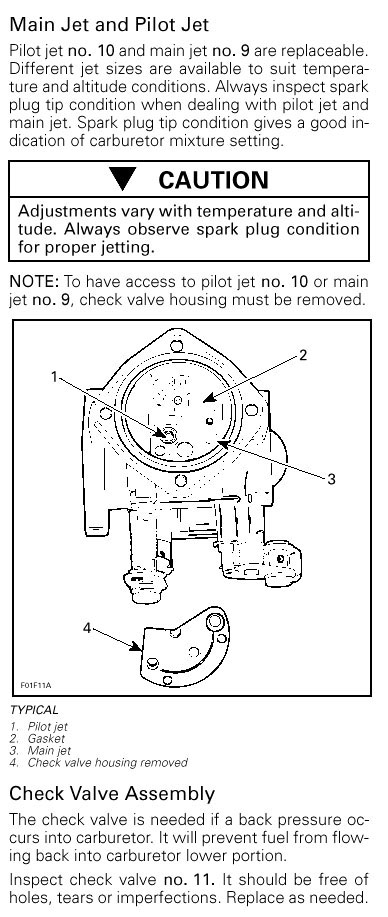
To Check Mikuni Internal Filter
To verify filter condition proceed as follows:
- Remove pump cover, gasket, diaphragm and then
pump body and gasket.
- Remove filter from carburetor body then clean filter and blow carefully with compressed air (low pressure).
- Replace filter if damaged.
While apart, inspect valves (flaps) and diaphragm. The pumping area should be free of holes, tears or imperfections. Replace if damaged.
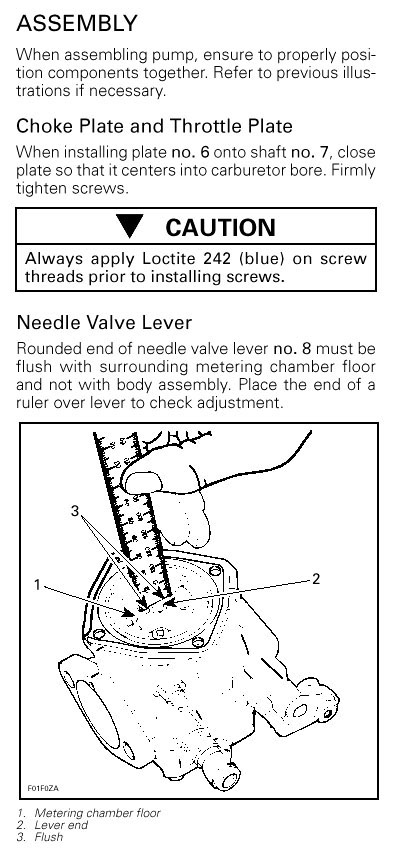
Needle Valve Leak Test
Needle valve must stand a pressure of 69 kPa (10 PSI) for 30 seconds.
If it doesn’t, hold carburetor upside down, pour oil over needle valve and retest.
Check for bubbles. If they come from seat or O-ring, bubbles will exit around seat. Retighten as
necessary.
If it still leaks remove needle and seat and replace O-ring.
If bubbles come from needle, replace needle and seat.
Mikuni Tricks & Tips…
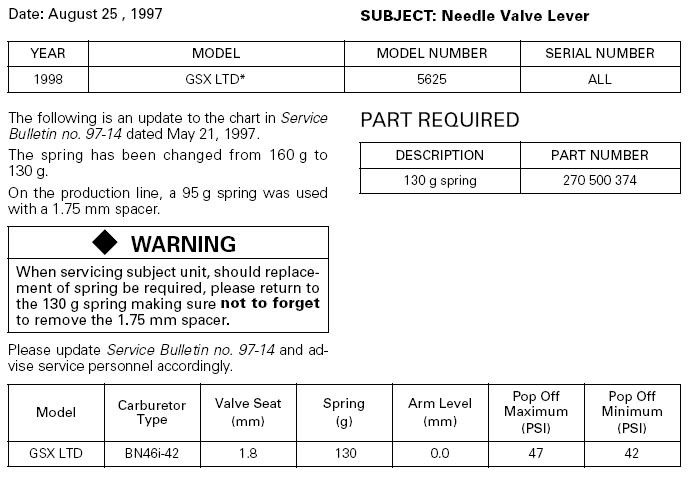
- If you have a hard time removing the valve body screws or cover screws, a good thing to have is an impact driver available at Harbor Freight or other tool suppliers. One or two whacks with the hammer and that stubborn fastener is loose! I even have used it to get stubborn low and high speed needles out!
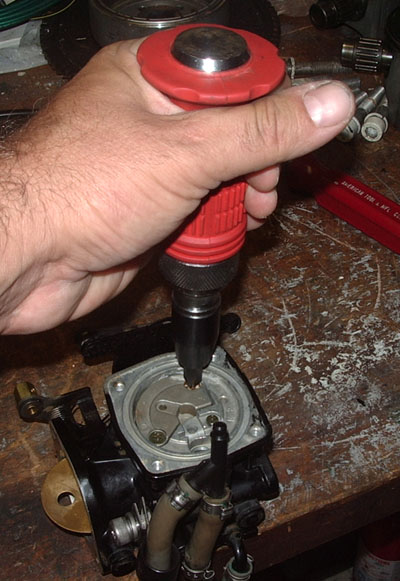
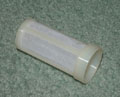
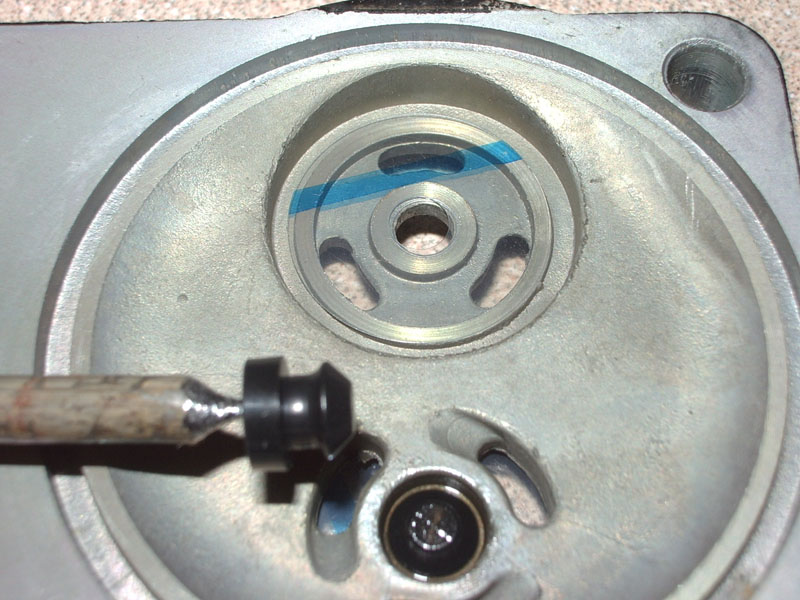
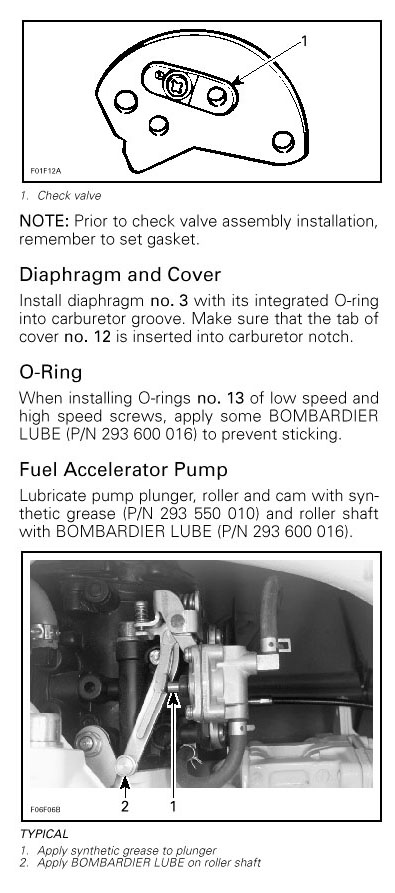
- To install fuel pump disks…
If you don’t have a tool, you can make one out of a nail or coat hanger. Using a bench grinder, grind a 2mm ball in the end as pictured below (I used a nail).
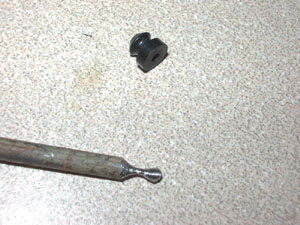
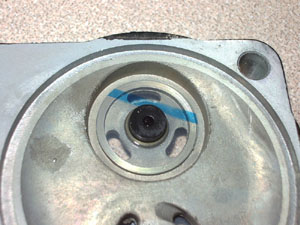
Once you have the tool, place the disk with the line up on the pump body. Install the grommet on your tool and spray a little Sea Doo lube or WD40 on the grommet to help with installation.

Working the grommet while firmly pushing, install it through the disk and the pump body. Once it’s all the way in, check the backsinde and make sure the grommet is all the way through and can move a bit from side to side when moved.
Carb Rebuilding Procedures

|