Procedure for Sea Doo Speedster Battery Conversion
The stock Sea Doo Speedster dual batteries in my 1995 were a constant pain, so I decided to do something to make the system more reliable. I removed the dual batteries, modified the existing tray, and installed a full size marine battery. A full size battery gives more reliable starting as well as more power for accessories such as stereo, etc. I don't know which other models this conversion will work with, but works well with the older Speedsters. If you aren't sure of the fit, make sure to do some measuring before jumping into this project!
The procedure is relatively easy and only takes a couple of hours at most to complete. Once the stock trays are modified, the larger battery fits perfectly! I also utilized the stock tie downs but connected two together to make one long one. Lastly, I attached the battery cables to a pair of quick release battery terminals that I bought at Pep Boys to complete the installation. If you don't want to go that route, I suggest installing larger terminals to the Positive and Negative cables so you can use the stud/wing nuts. Also, to fit the larger battery into that space without removing the pipe, I elected to remove the oil tank. You'll want to do this procedure when your oil tank is low to reduce the chance of spillage.

Tools needed: - 10 mm ratchet
- 11 mm ratchet with extension
- Flat screwdriver
- Small saw or dremel
- Pliers
Parts needed:
- NEW Marine Starting Battery
- Zip ties
- Quick disconnect terminals (optional)
Procedure:
- Remove the upper clamp from the oil fill hose.
- Cut zip tie (if there is one) and remove the upper fuel gauge hose located near the oil fill inlet on the tank.
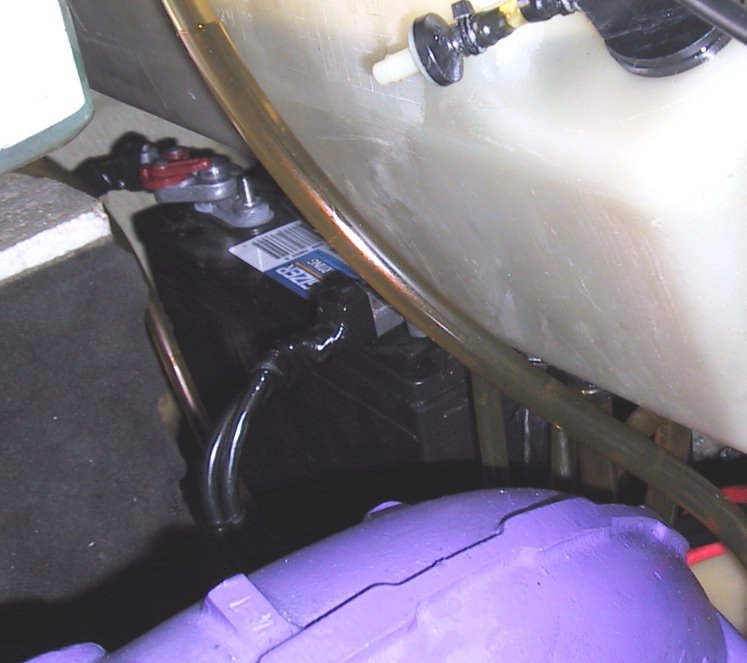
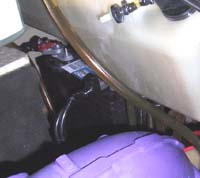
- Using the 11mm ratchet, remove the three nuts and washers securing the oil tank. You then can move the tank into the position shown in the picture above with a little work.
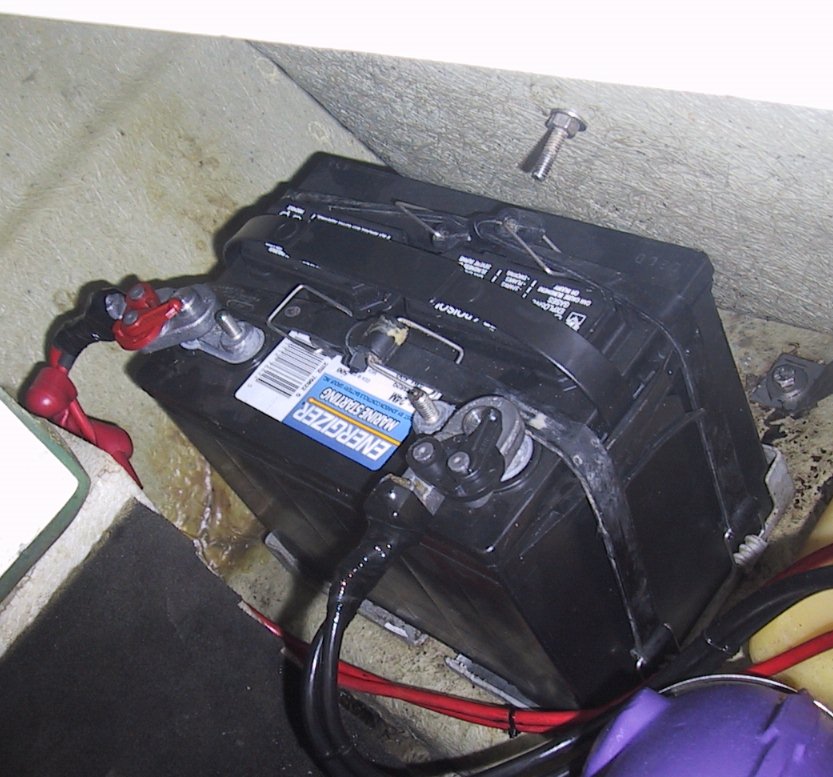
- Using the 11mm ratchet, remove the battery cables from the old batteries.
- Remove the four retaining straps and lift out the old batteries. If they are still good, you may want to save or discard properly.
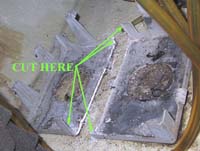
- Looking at the picture above which points out spots to cut, cut through the stock battery trays vertically until you reach the lower corners.
- Using a pair of pliers, break out the center pieces of the retaining trays so that the completed modification looks like the picture above.
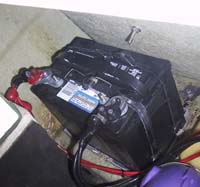
- Now install the new battery into the modified tray.
- Using either new terminals or quick disconnect ones on the battery cables, attach the wires to their proper posts on the new battery. Test the ignition on both engines at this point to make sure the battery is functioning properly.
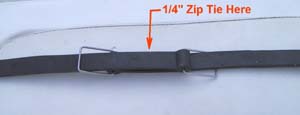
- Make a pair of extended battery straps by weaving two straps together and fasten in place shown with a Ľ” zip tie. Install the straps on the new battery to retain it in the tray.
- Reattach the oil tank and hoses in the reverse order that they were removed and check for any oil leaks.